You are here: SwitchKit® Development Environment - CSA User’s Guide > 6 Configuring Resource Cards > Configuring the DSP-ONE Card

This procedure describes configuring the DSP-ONE card.
Before you begin
You must have a node view window open in configuration mode.
Configuring the DSP-ONE Card
The following steps explain the DSP-ONE card configuration.
1 To access the DSP-ONE card configuration dialog box, do one of the following:
• Select the DSP-ONE card in the node view. Go to the Configuration menu and select Card®DSP Configuration.
• Right-click the DSP-ONE card in the node view and select DSP Configuration from the menu.
• Double-click the DSP-ONE card in the node view.
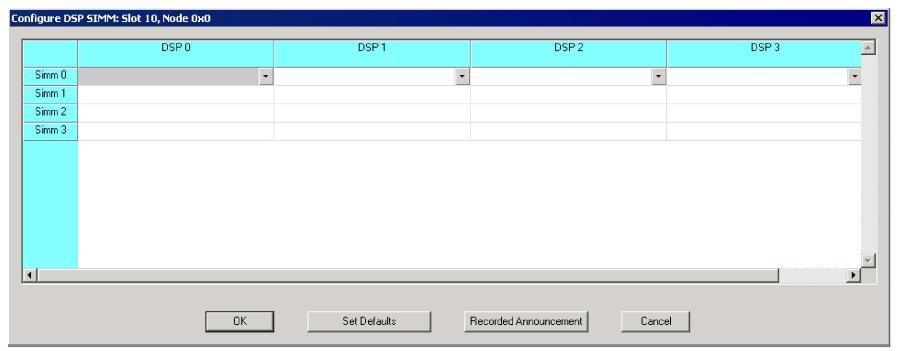
The DSP-ONE configuration dialog opens:
2 Type in the values for each DSP-ONE SIMM, if you do not want to use the default values. See the next screen shot.
To specify all the default values of all the DSP-ONE SIMMs, click Set Defaults. See the next screen shot.
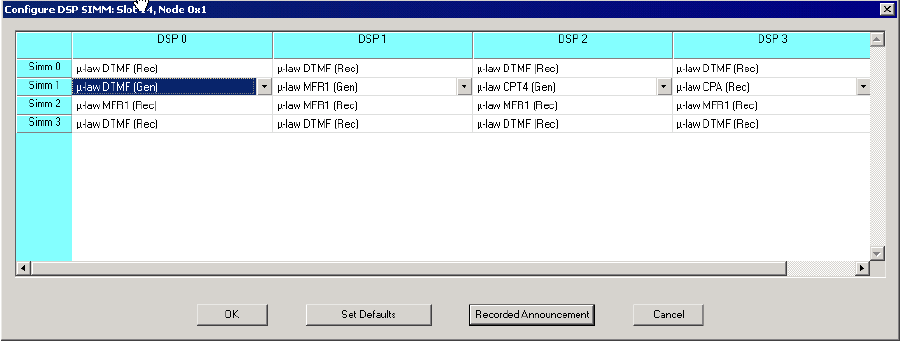
3 Change the default configuration settings through the drop-down lists in each table cell. See the next screen shot with example data.

On the DSP-ONE card, SIMM modules zero (0) and two (2) may be populated for a Voice Recorded Announcement System, (VRAS). It is important that the configuration mirror the physical hardware. If configuring VRAS, all DSPs on that SIMM must be configured for VRAS. If you only have one configured when you click Recorded Announcement, the following message pops up:
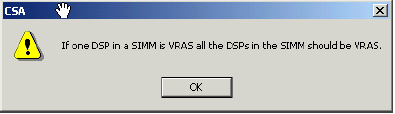
Click OK. When you click the next DSP you will get the following message:
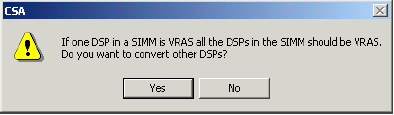
Click Yes to have VRAS automatically assigned.
4 As soon as you select VRAS for SIMM modules 0 and/or 2, the Recorded Announcement button becomes enabled. Click Recorded Announcement to enter the relevant dialog box. See the next screen shot.
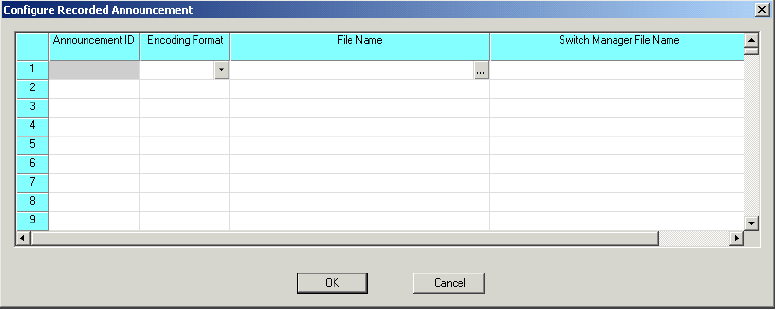
5 Enter the Announcement ID.
Important! If the Announcement ID is already allocated on the CSP and you attempt to download it again, the download fails. You must first delete the recorded announcement file that has been previously associated with that Announcement ID.
6 Select the Encoding Format from the drop-down menu.
7 Click the File Name cell and click browse to select a file containing the announcement, or type the path and file name in the table cell. This file should be in a Pulse Code Modulation format such as, *.vox.
8 You do not specify the SwitchManager file name. Click OK to close the Recorded Announcement dialog box.
9 Click OK to close the DSP-ONE card configuration.

Note
Configuration changes are not sent to the CSP until you select the menu: Configuration® Configure Through SwitchMgr® Send Only Modified Configuration To Switch.