Adding a Node Online

This procedure describes how to add and configure a node within the graphical user interface when the CSA is connected to a CSP.
Before you begin
The node to be added must already have system software downloaded through a TFTP server. The LLC and SwitchManager must be running. For information on starting the LLC and SwitchManager refer to the SwitchKit documentation set.
 If you already have other nodes configured, selecting the menu option Configuration® Configure Through SwitchMgr® Send All Configurations To Switch will reconfigure those nodes. Thus, Send All Configurations to Switch should only be used when creating a new configuration. Send All Configurations to Switch replaces any previous configuration. When adding a node to an already configured system, you should select the menu option Configuration® Configure Through SwitchMgr® Send Only Modified Configuration To Switch.
Configuring a Node Online
Do the following to add and configure a node online.
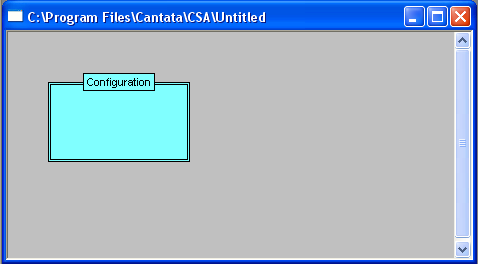
1 Go to the File menu, select New Configuration.
The Configuration icon opens in the global view.
2 After the Configuration icon appears, you can access the configuration menus. To access the configuration menus, do one of the following:
• Right-click the Configuration icon and select Add New Node.
• Left-click the Configuration icon to activate it (an activated configuration box has a double-line border). On the menu, go to Configuration® System® Add New Node.
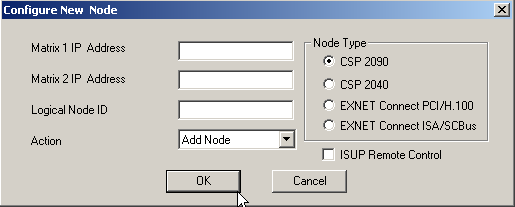
The Configure New Node dialog box opens.
3 Enter the Address(es) and Node ID. The valid range of logical node IDs is: 0-254. Select the node type you want to add by clicking the corresponding radio button.
Important! Select the option to enable Remote Control, if you want to use a multi-node system without an EXNET® (ring) card.
4 Click OK in the Configure New Node dialog box. The CSA displays a node in the configuration icon.
5 Double-click the node, the node view window opens.
6 In the node view, right-click in the space around the card slots and select Populate Card from the node.
If you are not already connected to an LLC, the Connect to LLC dialog box is invoked. Enter the Label, which becomes the name of the node. If you have a redundant LLC, enter the Name and Address which can be either an IP address or a machine name.
7 Once the connection is completed, a monitor icon appears in the global view.

Note
When you have completed the previous steps, the node view in the configuration mode displays the populated cards. The node view in the monitor mode displays the live system.
You can now make changes to your system configuration or do any provisioning that is required. Remember that changes under all menus other than the configuration menus are executed immediately. Configuration changes are not sent to the CSP until you select the menu: Configuration® Configure Through SwitchMgr® Send All Configurations To Switch or Configuration® Configure Through SwitchMgr® Send Only Modified Configuration To Switch.