You are here: SwitchKit CSA User’s Guide > 3 Configuring Line Cards, Spans, and Channels > Configuring the T-ONE Card

This procedure describes configuring the T-ONE card.
Before you begin
You must have a node view window open in configuration mode.
Information Source
Please refer to the T-ONE information contained in the SwitchKit user’s guides and the Developer’s Guide: Line Cards.
Configuring the T-ONE Card
The following steps explain the T-ONE card configuration.
1 To access the T-ONE card configuration dialog box, do one of the following:
• Select the T-ONE card in the node view. Go to the Configuration menu and select Card®Span Configuration.
• Right-click on the T1 card in the node view and select Span Configuration from the menu.
• Double-click the T-ONE card in the node view.
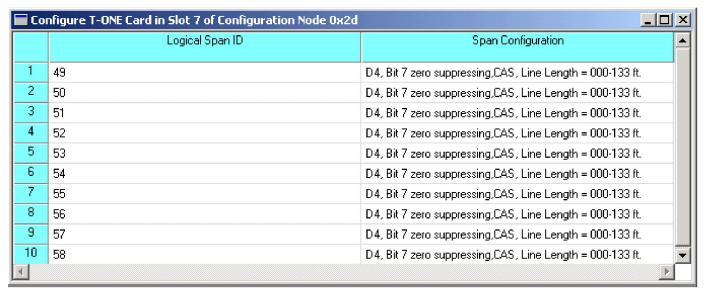
The Configure T-ONE dialog box opens:

2 To configure the spans, highlight the range of spans you want to configure.
3 Right-click in the Span Configuration column and select Span Format Configuration from the menu.
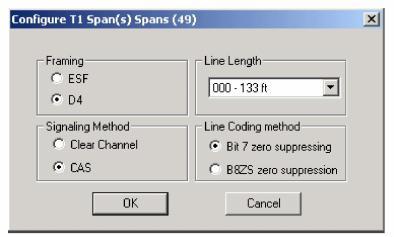
The next dialog box opens.

4 Specify the Framing, Signaling Method, Line Length, and Line Coding Method.
5 Click OK to close the dialog box. Your span configuration is now displayed in the T-ONE Card configuration table.
6 Click OK to close the T-ONE card configuration dialog box.
7 You can also configure all T1 spans at once. In the node view window right-click in the area around the slots and select Configure All T1 Spans from the pop-up menu. A message box pops up telling you that the configuration will not be applied to unassigned spans. Click OK and the Configure T1 Spans dialog box opens as shown in Step 3 of this procedure. Follow Steps 3 to 6 to Configure All T1 Spans.
Note
Configuration changes are not sent to the CSP until you select the menu: Configuration®Configure Through SwitchMgr ®Send Only Modified Configuration To Switch.