You are here: SwitchKit CSA User’s Guide > 4 Configuring Signaling Cards > Configuring the ISDN Card

This procedure describes configuring the ISDN card.
Before you begin
The signaling method for an E1 span and/or T1 span must be set to: clear channel. An ISDN card requires an I/O card (CCS I/O) only when redundancy is being supported. You must have a node view window open in configuration mode.
Information Source
Please refer to the ISDN information contained in the API Reference and the Converged Services Platform, Developer’s Guide: Common Channel Signaling.
Configuring the ISDN Card
The following steps explain the ISDN card configuration.
1 To access the ISDN card configuration dialog box, do one of the following:
• Select the ISDN card in the node view. Go to the Configuration menu and select Card®ISDN Configuration.
• Right-click on the ISDN card in the node view and select ISDN Configuration from the menu.
• Double-click the ISDN card in the node view.
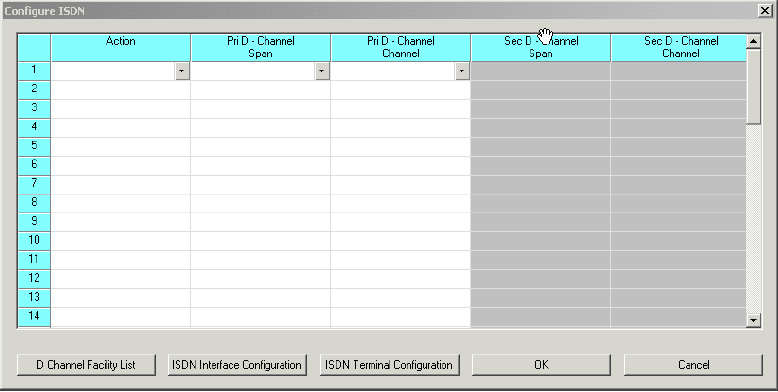
The Configure ISDN dialog box opens. The configuration data shown in the screen shot on the next page is example data.

2 Specify the Action, Primary D Channel Span, and Primary D Channel through the drop-down lists in the table cells.
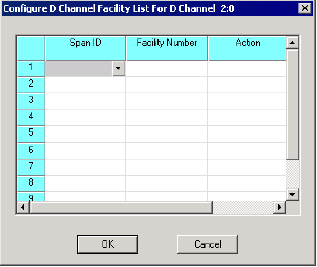
3 Click D Channel Facility List to access the next dialog box:

4 Select the Span ID, Facility Number, and Action from the drop-down lists in the table cells.
5 Click OK to close the Configure D Channel Facility List dialog box and to return to the Configure ISDN dialog box.
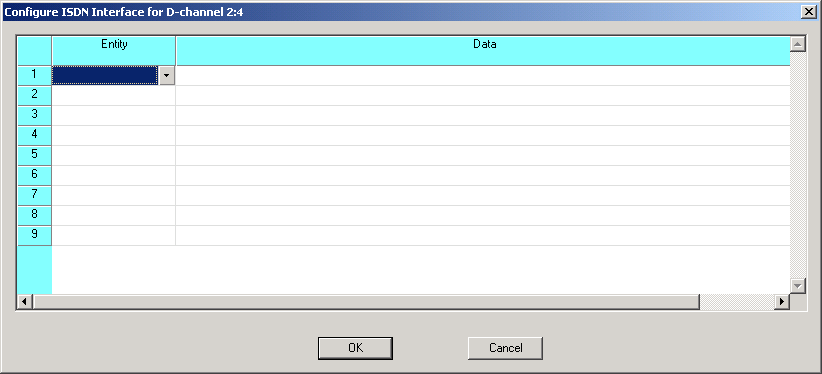
6 Click ISDN Interface Configuration to open the following dialog box:

7 Select the Entity from the drop-down list in the table cell.
4. Enter the Data. The data can be entered in hexadecimal or decimal with spaces, for example, 00 23 10 2a.
8 Click OK to close the Configure ISDN Interface dialog box and to return to the Configure ISDN dialog box.
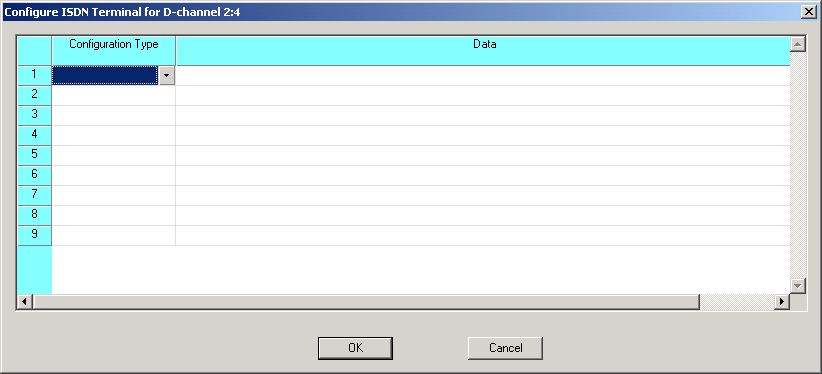
9 Click ISDN Terminal Configuration to open the next dialog box:

10 Select the Configuration Type from the drop-down list in the table cell.
11 Enter the Data.The data can be entered in hexadecimal or decimal with spaces, for example, 00 23 10 2a.
12 Click OK to close the Configure ISDN Terminal dialog box and to return to the Configure ISDN dialog box.
13 Click OK to close the ISDN card configuration.

Note
Configuration changes are not sent to the CSP until you select the menu: Configure® Configure Through SwitchMgr® Send Only Modified Configuration to Switch.