You are here: SwitchKit CSA User’s Guide > 3 Configuring Line Cards, Spans, and Channels > Deleting, Adding or Modifying Channels
Deleting, Adding or Modifying Channels

This procedure describes how to delete, add, or modify channels from a group.
Before you begin
To delete, add or modify a channel from a group, you must be in configuration mode with an open global view window.
Deleting, Adding or Modifying Channels
The following steps explain how to delete, add, or modify channels from a group.
1 To open the Configure Channel Group dialog box, do one of the following:
• Right-click on the Configuration icon and select Channel Group Configuration from the menu.
• Select the Configuration icon. Go to the Configuration menu and select System®Channel Group Configuration.
• Click on the Configuration icon. Select the Configuration menu, Node Configuration®Channel Group Configuration.
• Right-click on the blue part of the node view, select Channel Group Configuration.
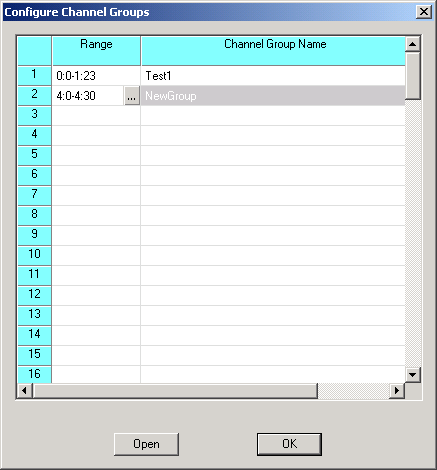
This opens the Configure Channel Groups dialog box as shown on the next page:

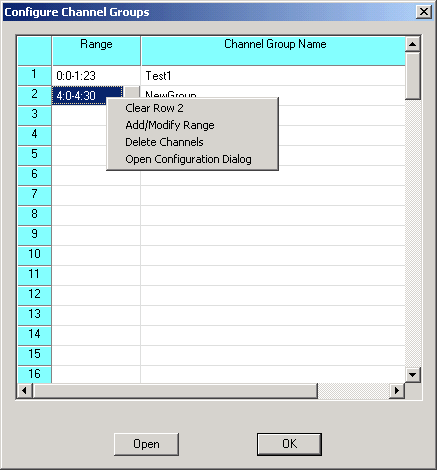
2 Right-click in the Range cell of the channel group that you want to delete, add, or modify. Select an option from the pop-up menu. See the next screen shot.

3 If you select Clear Row 2, you will get a message. Click OK. See the next screen shot.

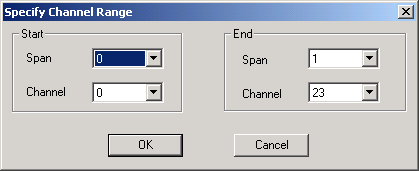
4 If you select Add/Modify Range or Delete Channels the Specify Span Range dialog box opens. See the next screen shot.

5 Specify the Start Span and Channel.
6 Specify the End Span and Channel.
7 Click OK to close the Specify Span Range dialog box. This brings you back to the Configure Channel Groups dialog box.
8 To close the Configure Channel Groups dialog box, click OK.

Note
Configuration changes are not sent to the CSP until you select the menu: Configuration®Configure Through SwitchMgr ®Send Only Modified Configuration To Switch.