You are here: SwitchKit CSA User’s Guide > 2 Basic Configuration - System/Node > General Node Configuration

This procedure describes how to do a general node configuration.
You must have a node view window open in configuration mode.
Configuring a Node
Follow the steps below for configuring a node:
1 To enter the configuration dialog box for the general node configuration, either
• Right-click in the node view window around the card slots, and select General Node Configuration from the pop-up menu, or
• With the node view window open, go to the Configuration menu and select Node Configuration®General Node Configuration.
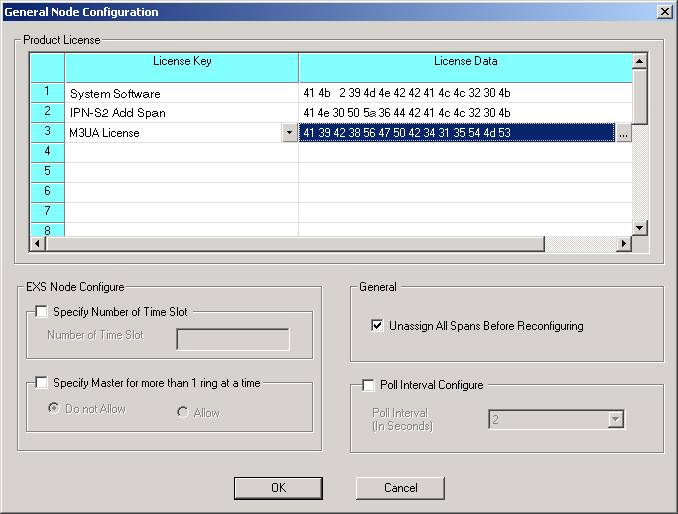
The General Node Configuration dialog box opens. The screen on the next page shows example configuration settings.

2 Select the License Key from the drop-down list.
3 In the Product License field, you must specify your product license file or type it in the License Key column. Cantata Technology recommends you read in your license file. To do this, use the browse button or right-click on a blank row under License Data . Select File and open the file name.
To enter the key manually, right-click a blank row in the Product License table, select Edit Message, and type the number. The key must be entered in Hexidecimal with spaces. For example: 00 23 10 2a.
4 If you are using a multi-node system, enable the fields under the group, EXS Node Configure.
• By default, no Time Slot number is specified. To specify a Time Slot number, select the Specify Number of Time Slot box. Enter the Number of Time Slot in the input field.
• By default, the configuration will not allow the node to be master for more than one ring. To change the setting, select the Specify Master for more than 1 Ring at a time box. Select between Do Not Allow and Allow.
5 Select Unassign All Spans Before Reconfiguring, if required.
6 Select the Poll Interval Configure box, if you want to change the default setting (two seconds) for the Poll Interval. Select the new value from the drop-down list. Cantata Technology recommends that you not change this.
7 Click OK to close the General Node Configuration dialog box.

Note
Configuration changes are not sent to the CSP until you select the menu: Configuration®Configure Through SwitchMgr ®Send Only Modified Configuration To Switch.