You are here: SwitchKit CSA User’s Guide > 4 Configuring Signaling Cards > Configuring SCCP/TCAP on an SS7 card
Configuring SCCP/TCAP on an SS7 card

This procedure describes how to configure the Signaling Connection Control Part (SCCP) and Transaction Capabilities Application Part (TCAP) on an SS7 card.
Before you begin
You must have an SS7 card configured. See Configuring the SS7 Card. You must have a node view window open in configuration mode.
Important! When using SS7 PQ cards in either a single node or a multi-node system you may configure a total of 3000 physical and virtual CICs, if both ISUP and SCCP/TCAP are to be configured for this system.
Configuring SCCP/TCAP
Follow the steps below to configure SCCP/TCAP on an SS7 card.
1 Double-click on the SS7 card in the node view to open the Viewing SS7 ... Card in Slot... dialog box.
2 To open the Configure SS7 SCCP/TCAP... dialog box do one of the following:
• In the Viewing SS7... Card in Slot... dialog box, right-click a stack for which you want to configure SCCP/TCAP and select SS7 SCCP/TCAP Configuration.
• In the Viewing SS7... Card dialog box, select a stack for which you want to configure SCCP/TCAP and click the menu, Configuration®SS7®SS7 SCCP/TCAP Configuration.
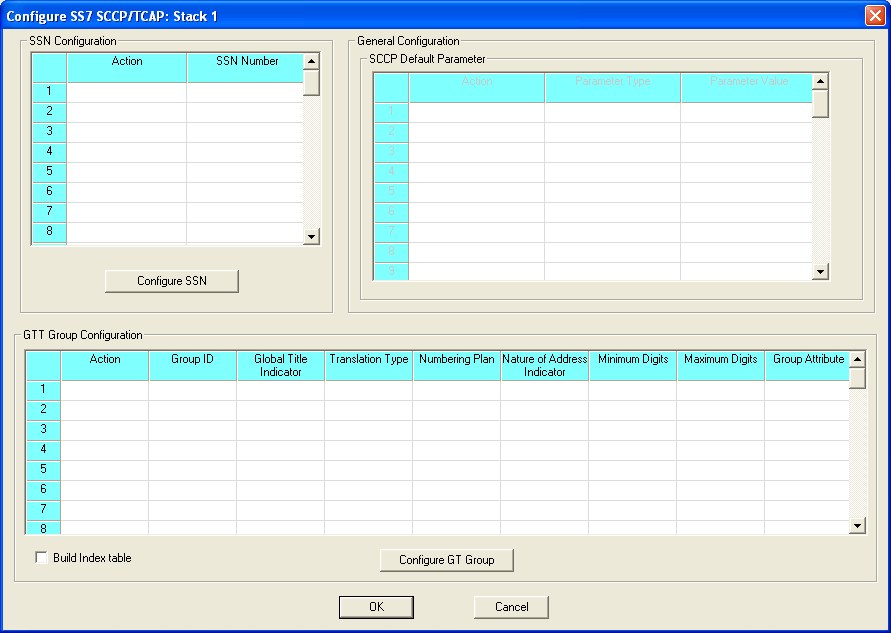
The next screen shot shows the Configure SS7 SCCP/TCAP... dialog box.

3 To configure a Subsystem Number (SSN), under SSN Configuration click in the Action cell and select Add.
4 Enter a value for the SSN Number.
5 Click the Configure SSN button.
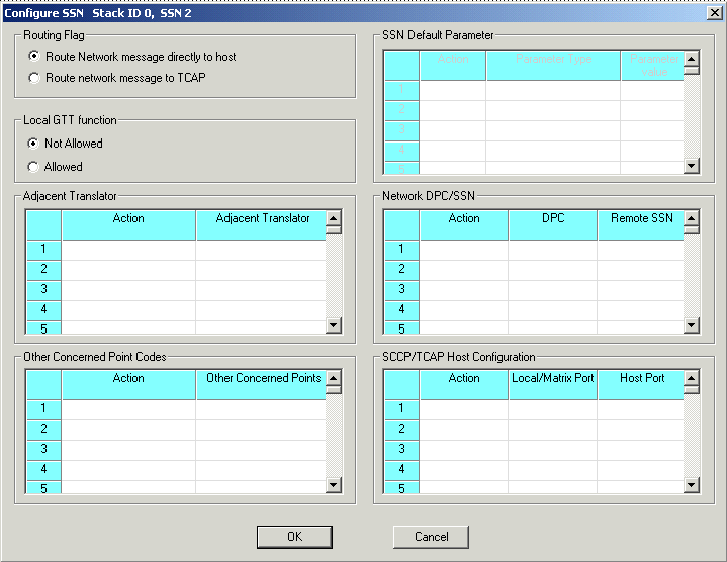
The Configure SSN... dialog box opens. See the next screen shot.

6 If you want to change from the default options in Routing Flag and Local GTT Function, select another button.
7 You can configure the following SCCP/TCAP options for a subsystem by first selecting Add under the Action columns:
• Adjacent Translator
• Other Concerned Points
• Network DPC/SSN
• SCCP/TCAP Host Configuration
Next, enter the values for the SCCP/TCAP options you are adding.
8 Click OK to close the Configure SSN... dialog box.
9 To configure a Global Title group, under GT Group Configuration click in the Action cell and select Add.
10 Enter the Group ID. The acceptable range of values is 0-127.
11 Enter values for the following fields:
• Global Title Indicator
• Translation Type
• Numbering Plan
• Nature of Address Indicator
• Minimum Digits
• Maximum Digits
The range of values for these fields is: 0-15.
12 To configure the Group Attribute, click the browse button.
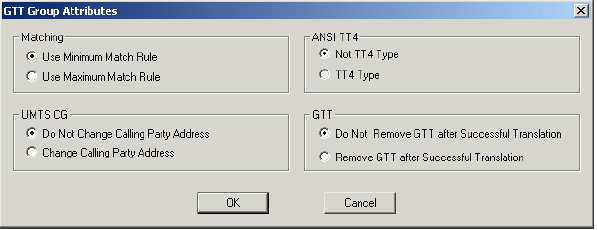
The GTT Group Attributes dialog box opens.

13 You can change the options for the following GT group attributes:
• Matching
• UMTS CG
• ANSI TT4
• GT
14 Click OK to close the GTT Group Attribute dialog box.
15 Click the Configure GT Group button.
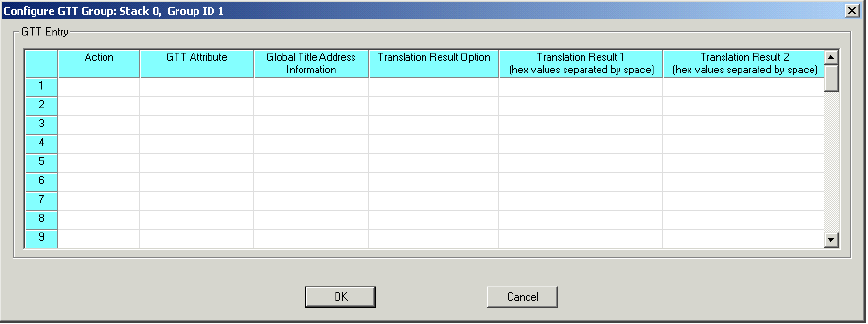
The Configure GTT Group... dialog box opens. See the next screen shot.

16 To configure a GT group, under GT Entry click in the Action cell and select Add.
17 Select the GT Attribute from the drop-down list.
18 Enter the Global Title Address Information.
19 Select the Translation Result Option from the drop-down list.
20 Enter the Translation Result 1 and the Translation Result 2.
21 Click OK to close the Configure GT Group... dialog box.
22 Select Build Index Table, if this is required.
23 Click OK to close the Configure SS7 SCCP.TCAP... dialog box.

Note
Configuration changes are not sent to the CSP until you select the menu: Configure® Configure Through SwitchMgr® Send Only Modified Configuration to Switch.