You are here: CSP Developer’s Guide: Overview > 3 Getting Started > Configuring Dual Ethernet Ports on IP Signaling and Matrix Controller I/O Cards
Configuring Dual Ethernet Ports on IP Signaling and Matrix Controller I/O Cards

You can configure the second Ethernet port on the
IP Signaling Series 3 I/O card to separate the H.323 signaling traffic from the host control traffic. You can also configure the second Ethernet port on the Matrix Controller I/O card to separate the SIP signaling traffic from the host traffic.
For both cards, the host-to-CSP traffic is carried on Ethernet Port A and the signaling traffic is carried on the Ethernet Port B. Cantata recommends this configuration.
Configuring the second Ethernet port is optional but if you enter an IP Address for Ethernet Port B you must enter an associated Subnet Mask.
Important! Although a gateway IP Address may be configured for both Port A and Port B, only one is utilized. If two gateway IP addresses are defined, one for Port A and one for Port B the one specified for Port A will be used. Therefore, Cantata recommends that you configure only one gateway IP address and that it be on Port B.
If the BOOTP server goes offline causing the Matrix Contoller or IP Signaling Card to reboot, you get prompted for the Port A IP address, gateway IP address, and subnet mask if these were not stored. Enter these values for Port A. No other ports are configured.
Both of these features are fully explained in the Developer Guide: Internet Protocol as follows.
• Dual Ethernet Port in the H.323 Software chapter
• Dual Ethernet Port in the SIP Software chapter
This section explains how to configure the Dual Ethernet Port for either the IP Signaling Series 3 card or the Matrix Controller card.
The following are the Tag Definitions and values to configure in the procedure below.
|
Tag Name |
Value |
|---|---|
|
Port B IP Address |
130 |
|
Port B Subnet Mask |
131 |
|
Port B Gateway IP Address |
132 |
|
Port B Shared IP Address |
133 |
When you enter the Tag Name in the procedure below, you can precede each name with "Cantata" so they appear together in the list of options.
For example Cantata Port B Gateway IP Address.
This procedure uses Weird Solutions BOOTP Server NT running on Windows NT but you can use any BOOTP server running on any platform.
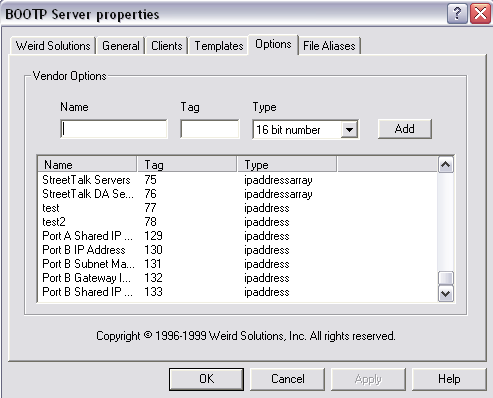
1 Double-click BOOTP Server NT from the Control Panel to display the Weird Solutions BOOTP Server NT dialog box. Select the Options tab.

2 Configure the Port B IP Address as follows:
• Type Port B IP Address in the Name box.
• Type 130 in the Tag box.
• Select ipaddress in the Type box. Click Add.
3 Configure the Port B Subnet Mask as follows:
• Type Port B Subnet Mask in the Name box.
• Type 131 in the Tag box.
• Select ipaddress in the Type box. Click Add.
4 Configure the Port B Gateway as follows:
• Type Port B Gateway IP Address in the Name box.
• Type 132 in the Tag box.
• Select ipaddress in the Type box. Click Add.
5 Configure the Port B Shared IP Address as follows:
• Type Port B IP Address in the Name box.
• Type 133 in the Tag box.
• Select ipaddress in the Type box. Click Add.
6 Click OK and scroll down the list of names on the Options page to verify that your entry appears with the correct information.

7 Select the Clients tab. Select the hardware address of the active IP Signaling Series 3 card in the Hardware Address box.
Click New and create the new hardware address if it is not listed.

8 If the IP Address for the IP Signaling Series 3 card is not already created, do the following:
If each IP address is not listed in the Configured options window, select IP address from the Available options window and click the >> button to move them into the Configured options window.

9 Configure the IP Address. Select the IP Address in the Available options window and click the >> button to move it into the Configured options window.
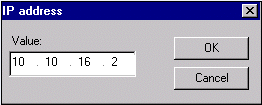
10 Select the option to change in the Configured options list and click Edit to set or change the value of the IP address or Shared IP Address. Type the new value and click OK.

11 Repeat steps 8-10 for each Option that you created.