You are here: SwitchKit CSA User’s Guide > 3 Configuring Line Cards, Spans, and Channels > Configuring the E-ONE Card

This procedure describes configuring the E-ONE card.
Before you begin
You must have a node view window open in configuration mode.
Information Source
Please refer to the E-ONE information contained in the SwitchKit user’s guides and the Developer’s Guide: Line Cards.
Configuring the E-ONE Card
The following steps explain the E-ONE card configuration.
1 To access the E-ONE card configuration dialog box, do one of the following:
• Select the E-ONE card in the node view. Go to the Configuration menu and select Card/Span Configuration.
• Right-click on the E-ONE card in the node view and select Span Configuration from the menu.
• Double-click the E-ONE card in the node view.
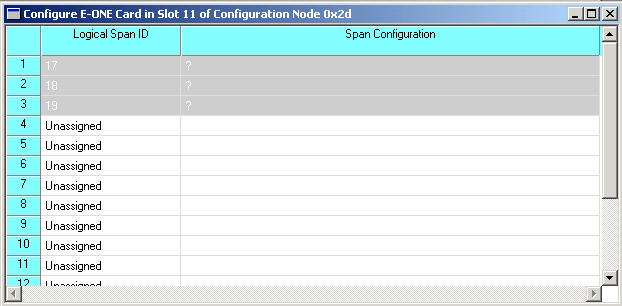
The Configure E-ONE Card dialog box opens.
2 To configure the spans, you can either:
• Highlight the range of spans you want to configure. To do this you first right-click in the highlighted area and select Assign Logical Span ID. Then, type a number in the Logical Span ID text box. This number is assigned to the first span highlighted.The other spans are automatically assigned IDs.
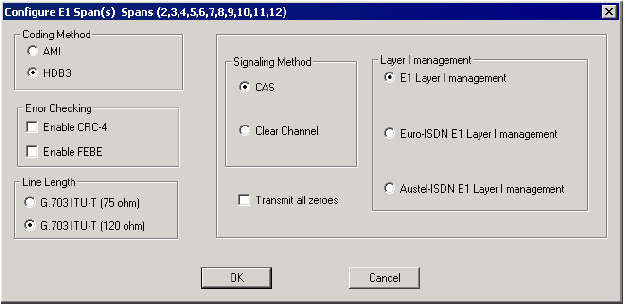
• Or, you may want to configure all E1 spans at once. In the node view, right-click in the area around the slots and select Configure All E1 Spans from the pop-up menu. A message box pops up telling you that the configuration will not be applied to unassigned spans. Click OK and the Configure E1 Span(s) dialog box opens.

To get to the Configure E1 Spans dialog box when only highlighting some spans, right-click in the Span Configuration column and select Span Format Configuration from the menu. The Configure E1 Span(s) dialog box then opens.
3 Specify the Coding Method, Error Checking, Line Length, Signaling Method, and Layer 1 Management.
4 You can also choose to Transmit all Zeroes.
5 Click OK to close the dialog box. Your span configuration is now displayed in the E-ONE Card configuration dialog box.
.

6 Click OK to close the E-ONE card configuration dialog box.
7 To configure the spans, highlight the range of spans you want to configure.
8 After the spans have been configured, you can configure channel groups. See Configuring Channel Groups

Note
Configuration changes are not sent to the CSP until you select the menu: Configuration®Configure Through SwitchMgr ®Send Only Modified Configuration To Switch.