You are here: SwitchKit CSA User’s Guide > 4 Configuring Signaling Cards > Configuring SS7 M3UA

This procedure describes configuring SS7 message formats for the MTP3 User Adaptation Layer (M3UA).
Before you begin
You must install an M3UA license file before you can perform configuration. See General Node Configuration. You need to configure a stack on an SS7 Series 3 card before you are able to configure M3UA message formats. MTP, ISUP and L3P must also be configured on the stack. Please refer to the procedure Configuring the SS7 Card for instructions.
Information Source
Please refer to the M3UA information contained in the SwitchKit user’s guides and the Developer’s Guide: CCS.
Configuring M3UA
Do the following to configure M3UA:
1 Right-click on the stack of an SS7 card in the node view and select the SS7 Stack Configuration.
2 In the Configure SS7 stack... dialog box, under Module Type, select M3UA from the drop-down list.
3 Under Module Variant, select a variant and then click OK.
4 Now you are ready to configure M3UA objects. Excel recommends that you configure these in the following order:
• Protocol
• Signaling Gateway/Signaling Gateway Process (SG/SGP)
• Route Sets
• Application Server Process (ASP)
• Application Server (AS)
• Connections
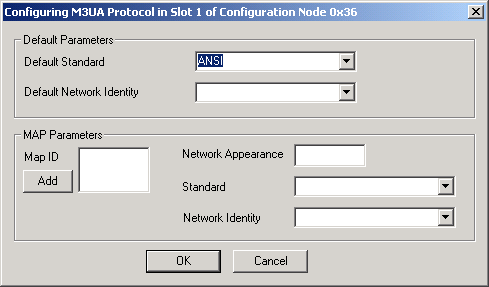
In the Viewing SS7 S3 Card... configuration dialog box, right-click on the stack that you configured with M3UA. Select Protocol from the drop-down list.
5 Select the Default Standard and Default Network Identity.
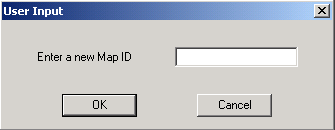
6 To enter a Map ID click Add, enter a value and then click OK.
The fields for Network Appearance, Standard, and Network Identity are assigned default values.
7 In the Viewing SS7 S3 Card... configuration dialog box, right-click on the stack that you configured with M3UA. Select SG/SGP from the drop-down list.
Important! All stacks on the same card share the same M3UA configuration.
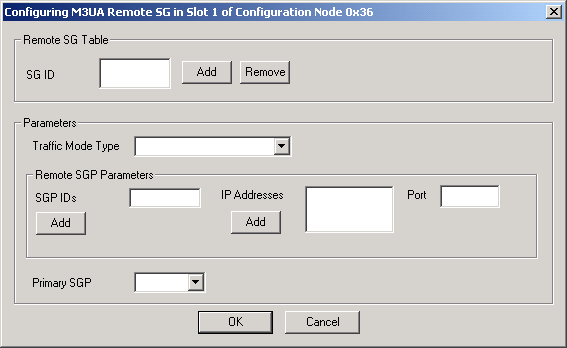
8 To configure the SG ID, click Add.
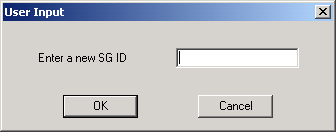
9 Enter an SG ID and click OK.
10 Select the Traffic Mode Type.
11 Configure the SGP IDs by clicking Add, enter an ID, and then click OK.
12 Configure the IP Addresses by clicking Add, enter an IP address, and then click OK. The Port is automatically populated and should not be changed.
13 Select the Primary SGP.
14 In the Viewing SS7 S3 Card... configuration dialog box, right-click on the stack that you configured with M3UA. Select Route Sets from the drop-down list.
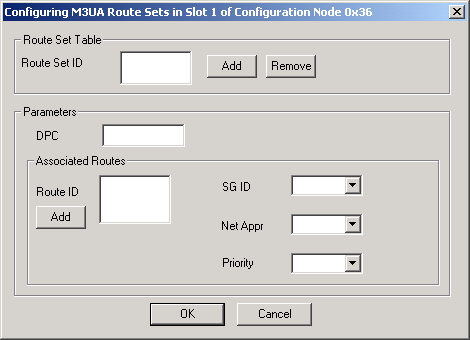
15 Configure the Route Set ID by clicking Add, enter an ID, and then click OK.
16 Enter a DPC.
17 Configure the Route ID by clicking Add, enter an ID, and then click OK.
18 Select an SG ID, Net Appr (network appearance), and Priority.
19 In the Viewing SS7 S3 Card... configuration dialog box, right-click on the stack that you configured with M3UA. Select ASP from the drop-down list.
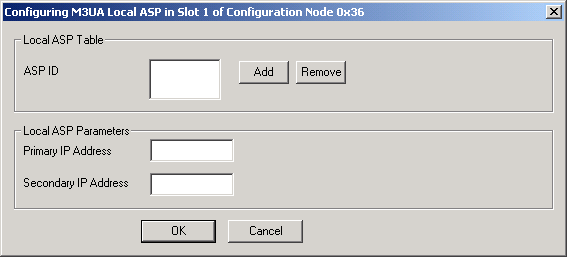
Important! The IP addresses must have been configured on the SS7 card pair in order for the message to be accepted by the switch.
20 Configure the ASP ID by clicking Add, enter an ID, and then click OK. Enter the Primary IP Address and the Secondary IP Address.
21 In the Viewing SS7 S3 Card... configuration dialog box, right-click on the stack that you configured with M3UA. Select AS from the drop-down list.
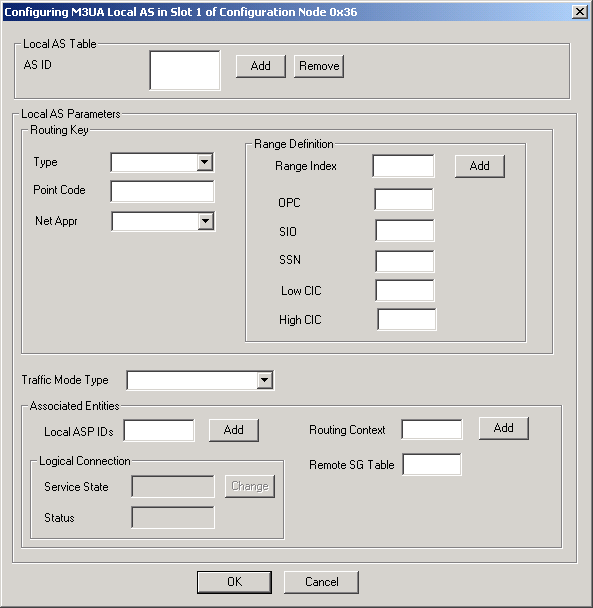
22 Configure the AS ID by clicking Add, enter an ID, and then click OK.
23 Under the Routing Key, select the Type.
24 Enter a Point Code.
25 Select the Net Appr (Net Appearance).
26 Under the Range Definition, the Range Index, SIO, and SSN are already populated. Ensure the values are the correct ones.
27 Enter the OPC, High CIC, and Low CIC.
28 Select the Traffic Mode Type.
29 Configure the Local ASP ID by clicking Add, enter an ID, and then click OK.
30 Configure the Routing Context (ID) by clicking Add, enter an ID, and then click OK. The Remote SG Table gets populated automatically. Ensure the values are the correct ones.
31 The Logical Connection fields are disabled.
32 In the Viewing SS7 S3 Card... configuration dialog box, right-click on the stack that you configured with M3UA. Select Connections from the drop-down list.
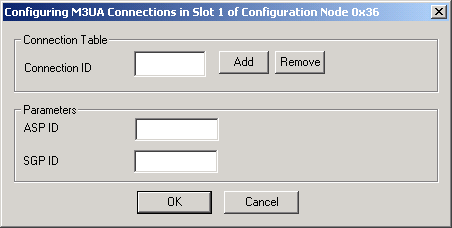
33 Configure the Connection ID by clicking Add, enter an ID, and then click OK.
34 Enter the ASP ID and the SGP ID and then click OK.