You are here: SwitchKit CSA User’s Guide > 7 System Provisioning and Monitoring > Changing the Event View

This section explains the Event View and how to use the Event Filter to change the Event View window.
Before you begin
Make sure that the LLC and SwitchManager are running. For information on running the LLC and SwitchManager refer to the SwitchKit documentation set. To enable the Event View menu, you must select a monitor icon of a node in the global view.
Event View
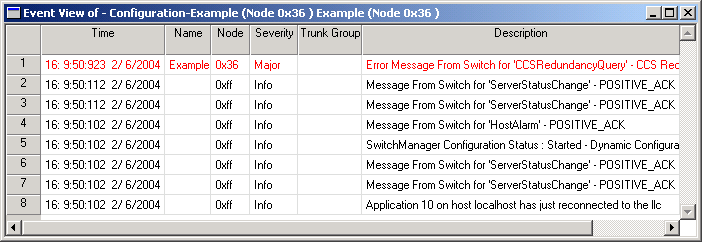
When you connect to an LLC, the CSA opens, by default, an Event View window for that connection. Major events are shown in red in the Event View window, other events are shown in black.
The CSA stores event view and filter settings in a default file. When you restart the CSA, it opens all the event views with the corresponding filters.
Events are added every two seconds to the Event View window. By default, up to 250 events are displayed in an Event View window at a time. The Event View displays a maximum of 2,500 events. The CSA stores events in memory using the first-in, first-out (FIFO) principle.
If you close this window and then want to re-open it, on the menu, select Event View®New Event View. The settings for the default filter are all events selected, except for PPL Events:

When the Event View is open, you can do the following:
• Acknowledge Event
• Sorting
The above tasks are described in more detail in the next few pages. To access the relevant menus, in the Event View, you right-click one of the events and make a selection. See the next screen shot:
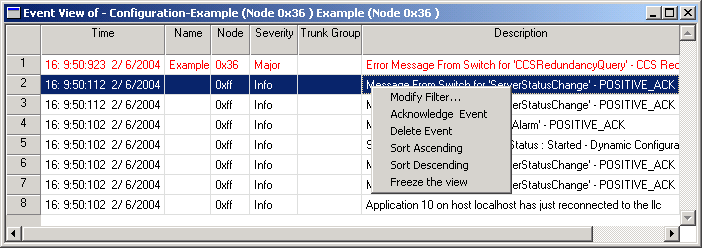
You can open more than one Event View window with different event filter settings. However, when you open a new Event View window, it always opens with the default event filter settings. You can change the default filters.
In the Event Filter dialog box, you can change filters for a node selected in the global view. The filter options relate to:
• Alarms
• Card Status Report
• Ring Status Report
• DSO
• Polls
Follow the next steps to change filters for an Event View.
1 With the monitor icon selected in the global view, go to the Event View menu and select Event Filter.
The Event Filter dialog box opens with the default settings selected, as shown in the next screen shot:
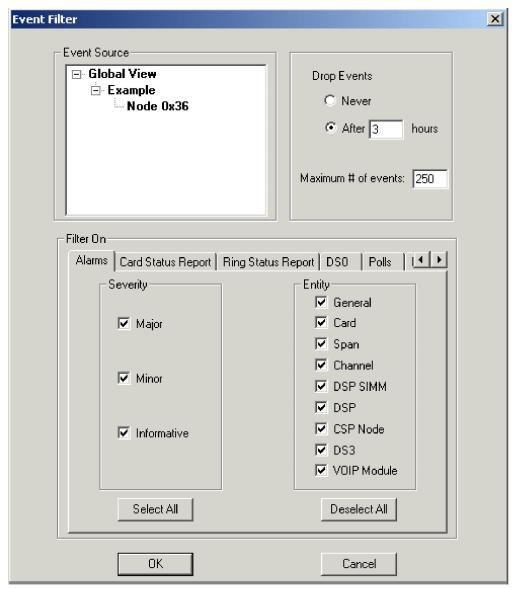
2 To change when events are dropped from your event view, select Never, or change the numbers of hours you want to see events before they are dropped. You can change the number of events that will be stored before they are dropped. You can store a maximum of 2,500 events.
3 You can change the Severity and Entity settings for Alarms by deselecting the relevant check boxes or using the buttons.
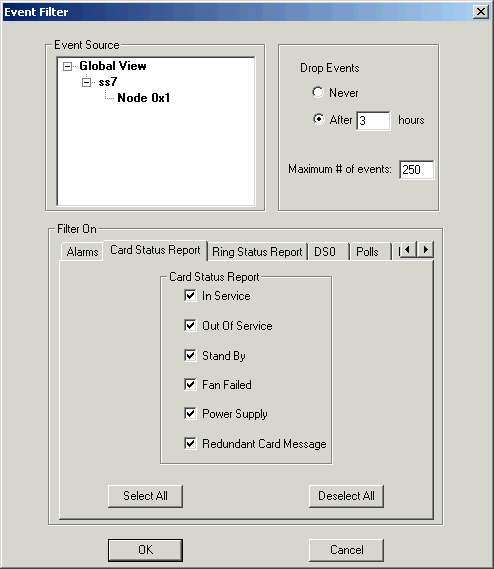
4 To change the filters on the Card Status Report, click on the tab and deselect the appropriate check boxes or use the Select All or Deselect All buttons.
The next screen shot shows the default settings selected.
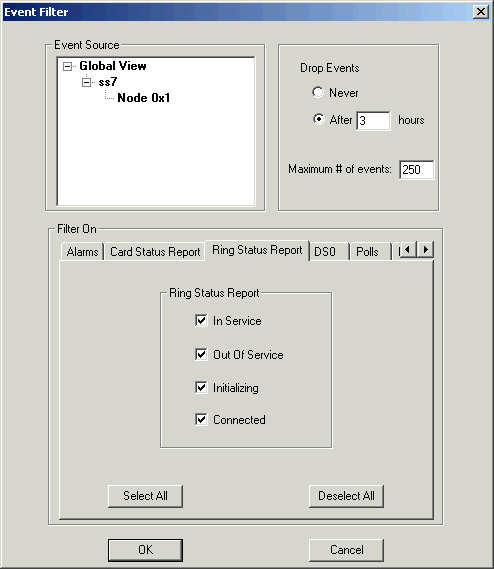
5 To change the Ring Status Report filters, click on the tab and deselect the appropriate check boxes or use the Select All or Deselect All buttons.
The next screen shot shows the default settings selected.
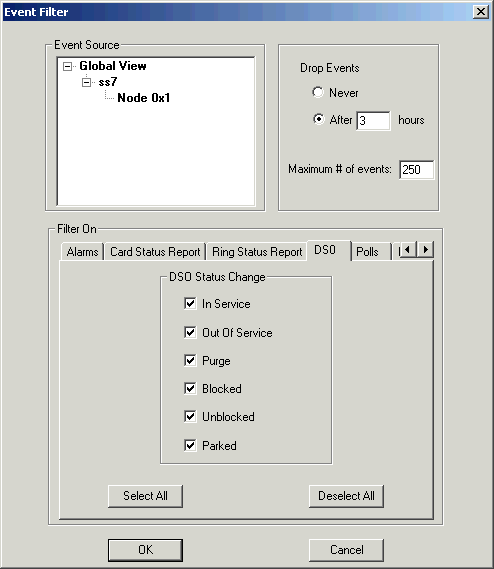
6 To change the DSO Status Change filters, click on the DSO tab and deselect the appropriate check boxes or use the Select All or Deselect All buttons.
The next screen shot shows the default settings selected.
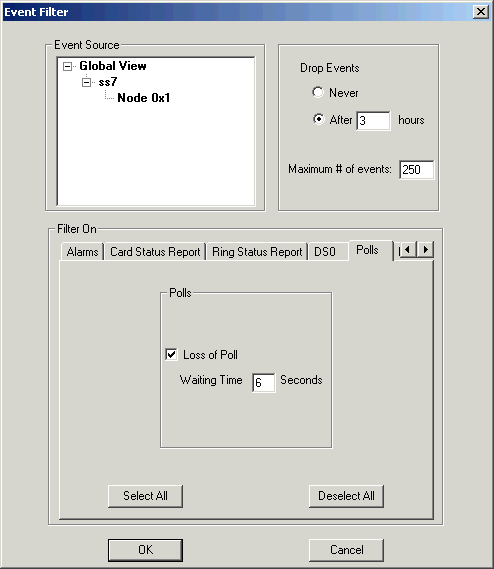
7 To change the filters on polls, click on the Polls tab and deselect Loss of Poll.
The next screen shot shows the default settings selected.
To save all changes to the event filters, click OK.

You can delete one event or several events at one time by selecting the rows in the Event View. Right-click on the selected events and then select Delete Event from the pop-up menu.
You can sort the view based on any field of the grid in ascending or descending order. However, the sorting only applies to events currently in the table. New events always get added at the top of the table.
To sort the events you right-click in the column of the field you want to sort in the Event View window, select Sort Ascending or Sort Descending from the pop-up menu.
You can freeze the view so that no more events are added to the view.
To do this, right-click in the Event View window, select Freeze the View from the pop-up menu.