You are here: SwitchKit CSA User’s Guide > 5 Configuring VoIP Cards and Features > Configuring the Call Agent

This procedure describes the configuration of the Call Agent feature that is available with the CSP Session Initiation Protocol (SIP) interface. By default, the Call Agent is disabled.
For more information on Call Agent, see the Developer’s Guide: Internet Protocol, Call Agent chapter.
Before you begin
Before you configure the Call Agent, you must locate your license file (license.cfg) which contains a license key. Contact your sales representative for a license. Copy the license file to your CSA folder. To install the license key, you must use the General Node Configuration dialog box. See General Node Configuration for the procedure on opening the license key.
To enable the Call Agent, you must configure the SIP interface and you can do this using the default values. See Configuring SIP. You must have virtual RTP line cards (VDAC-ONE or IP Network Interface Series 2) installed and configured with virtual spans. See Configuring Virtual Cards.
Configuring the Call Agent
The following steps explain the Call Agent configuration.
1 Open the CSP SIP configuration dialog box by doing one of the following:
• Select the matrix controller card in the node view. Go to the Configuration menu and select SIP®SIP Configuration.
• Right-click the node view window (outside the card slots) and select SIP Configuration from the menu list.
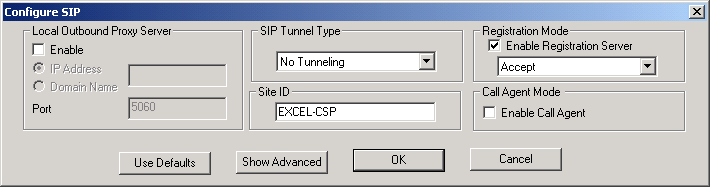
The Configure SIP dialog box opens. See the screen shot on the next page.
2 For the Call Agent Mode option, select the check box for Enable Call Agent.
Important! To enable this feature, you must have a license.
3 Click OK.
